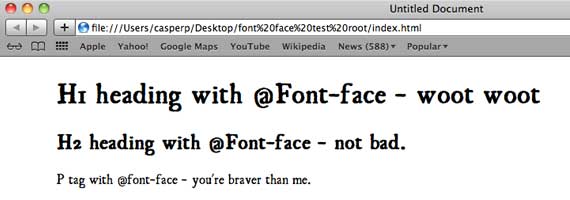
The Problem
Teaching web design to the “Designer” type, I’m constantly explaining to them why we can’t use all of our fancy design fonts we have on our computers when we design for the web. Luckily for us over the last couple years, the modern web has given us more tools to get a richer design experience. I’ve known about @font-face for a while but haven’t really pointed students in that direction in part because of the inevitable cross-browser issues.
The Solution
I’ve recently run across a tool at fontsquirrel.com that helps by converting your font into the different font formats needed, as well as providing a nice clean CSS style to integrate into your style sheet. I am now confident that my non-programming design students can reliably integrate some specialty fonts into their designs. Those brave enough to give it shot, here’s a quick how-to using Adobe Dreamweaver. If you do not need to use Dreamweaver or another IDE, I’m assuming you don’t need this tutorial.
<student Disclaimer>
Just because you can do something, doesn’t mean you should. Use specialty fonts with care, especially on the web. I suggest starting with your H tags and sticking with a standard font for the body copy.
</student Disclaimer>
Get Started
Download this simple root folder if you want to follow along on a practice site before you try this on your real site.
- Go to fontsquirrel.com
- Find an awesome font
- Download and unzip said awesome font
- Go to the Font Squirrel @font-face generator
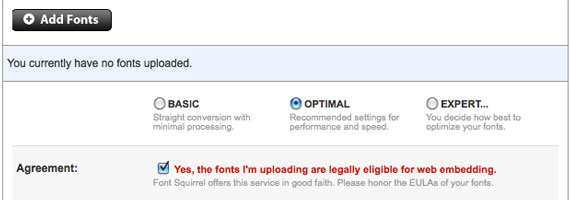
- Upload your font to the generator by clicking the Add Fonts button and browsing to your font.
- Use the optimal setting for the sake of ease and then click the download your kit button
- Download and Open the .zip file of the kit and extract your folder.
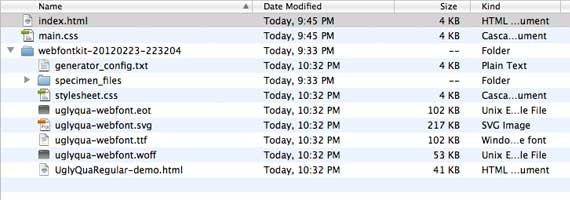
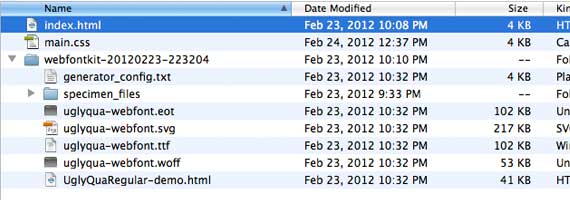
- Take this unzipped folder and put it in the top level of your root folder (with your index page and your .css file). Notice the “extra” font formats in this list. These formats are for different browsers. Thanks Font Squirrel!
- From the webfontkit folder open the file stylesheet.css in Dreamweaver
- Select all the code for the @font-face style and go to edit > copy
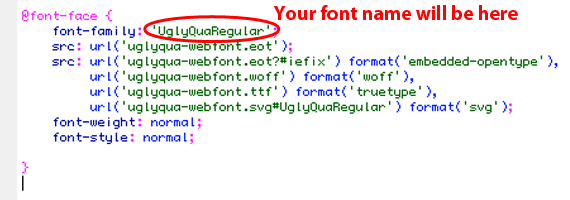
- Open your own sites main.css stylesheet, place your cursor at the top, and paste in the code you just copied by going to edit > paste. Save your main.css stylesheet.
- Delete the kits stylesheeet.css from your root folder. Your root folder should now look like this.
- Set up .css styles for your type elements. I’ve provided three in the sample site.
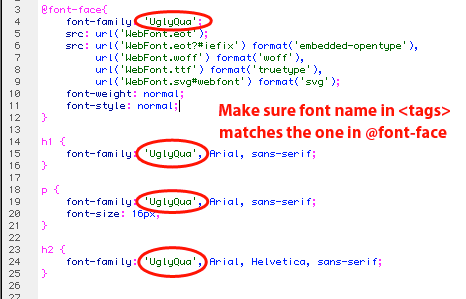
- Double check and make sure that the font name in the @font-face css style is the same as the font name in your root folder. (The generator sometimes adds “regular” to the end of fonts in the provided .css)
- Add the font name you want to use from the beginning of the @font-face attribute to your text element’s style declaration. Make sure it’s exactly the same in both places.
Test
Test your site in a few browsers to make sure your font is loading properly. Better yet upload your newly improved site (with fancy fonts and all) to your webserver, then call your mom and have her test it.
